
Alphabets on a washing line, tricky letter case studies and practice drills!
Welcome to tutorial 3! I hope you’ve enjoyed writing your moons and moomins – today we’ll look at the full alphabet so you can practice any words you like!
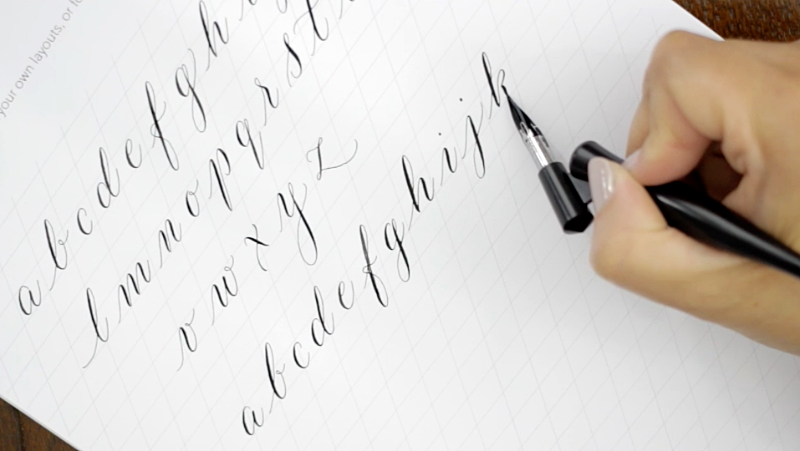
Download and print the worksheets below, and once again please pause and replay the tutorial as many times as you need to. It’s really useful to watch my demos of writing each letter a couple of times as you go.
Download these worksheets and print them (a couple of copies of each won’t hurt!) before you play the video.
1. Cheat sheet – alphabets
2. Letters: a – g
3. Letters: h – o
4. Letters: p – w
5. Letters: x – z
6. Guidelines for extra practice
7. First words
8. Tricky letters
We’ll also look at joining strokes, hence the “washing line” reference. Imagine as you begin to join your letters that you’re hanging them out to dry. They’re on your washing line, and you want to leave long gaps so the breeze can fit through! So joining strokes should be long, smooth and light as a feather, just like those very first lines we practised in tutorial 1!
Watch the video, pausing and rewatching as often as you like while you practice. (See my notes below to explain the cheat sheet (the faded one)) Enjoy!
Frequently Asked Questions
1. How do I use the cheat sheet?
I’m sorry I forgot to cover this in the video! Print out the cheat sheet and you’ll be able to make out the faint letters. Write over them slowly, noting where your pen will need to add pressure to make a thicker line. Then go on to practicing individual letters on the alphabet sheets. If there are any you really struggle with, you can always print another cheat sheet as a reminder!
2. What are alphabet ‘drills’?
Drills are basically exercises where you write lines of the same letter. It’s really good to practice this way – as you write a line of Gs (for example) you’ll be able to look back on each one and improve any mistakes. Aim for 5 perfectly matching letters at the end of each line!
The alphabet practice sheets include three example letters at the beginning of each row for you to copy. For each letter there’s a row of single (unjoined) letters for you to copy, and a second row where you should join up your letters. Practice the drills a couple of times, but don’t worry if they’re not 100% perfect before the next tutorial: as we move onto different practice methods you will improve, I promise!
If you get stuck on a particular letter, you should happily skip it and move along to the next one. It’s easy to develop a peculiar fixation for letters while you’re writing alphabet drills. But instead of driving yourself crazy with a letter you loathe, forget about it for now. Once you begin writing words it will come to you, and often without you realising you ever had a problem with it!
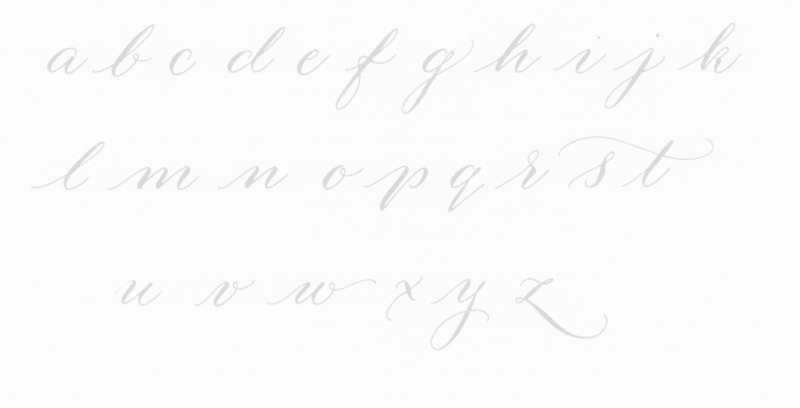
This is the cheat sheet. Use the download link above “Cheat sheet alphabets” to print a copy or two, and then trace it for your first practice, and whenever you need a reminder of how to form a particular letter.
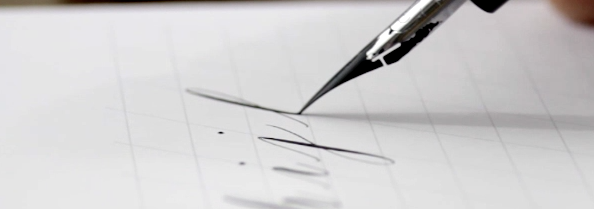
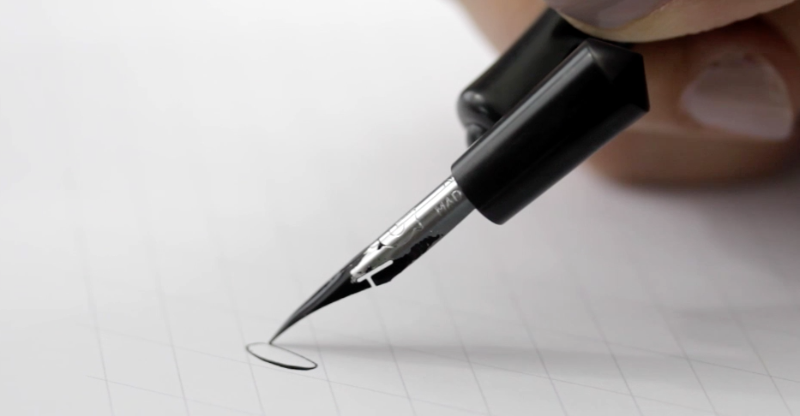
Close up of me writing an alphabet. Note how at the end of the letter h, as I’m about to turn a corner and come back up, I’m putting no pressure on the nib – this is a super light stroke even before I hit the line beneath the letter.
The alphabet demo in the video is short – it’s intended for you to watch, pause and replay in sections as many times as you need to. Pay attention to writing speed and pen angle as you go.
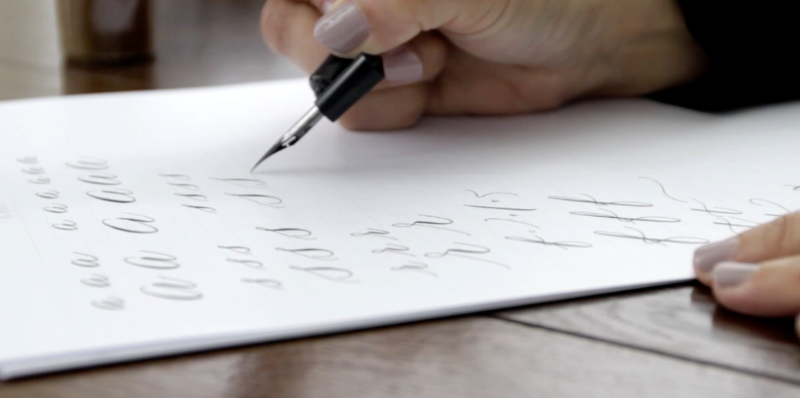
This is the additional worksheet for those tricky letters a, s, r, f, t, x and z.
Note the oval shape of the a, and the angle of the nib on the page. Don’t tilt your nib any higher than this, and try not to roll it to one side. It takes practice!
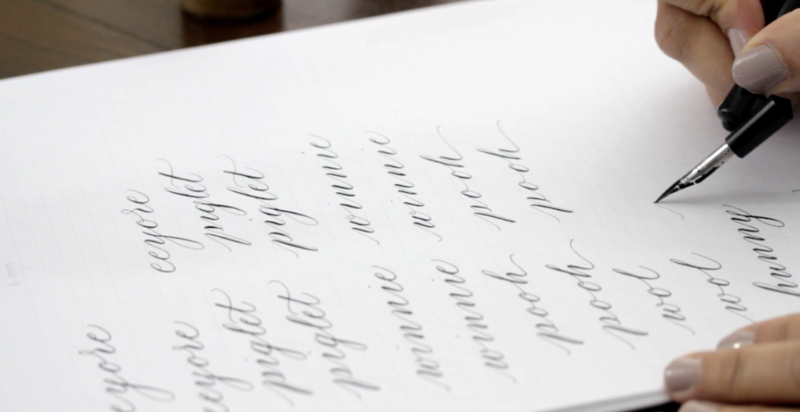
As soon as you’re ready, practice writing some words – they don’t have to be characters from Winnie the Pooh! Use anything as inspiration… list colours, fruits, write numbers (one, two, seventeen…) – whatever you like!
Next time…
We’ll be looking at capital letters, and I’ll encourage you to add a little flourish to your word practice. You’ll soon be able to write every letter in the alphabet, lower and upper case, so you can practice writing the words you’ll be using most in your calligraphy journey!
Video transcript
Hi! Today we’re diving straight into learning the alphabet. I always encourage students at my workshops to approach the alphabet in their own way – there’s nothing so dull as writing a, b, c… so grab your copy of my modern calligraphy alphabet and let’s choose some fun letters to begin with!
Remember it’s important to point your pen at 1 o’clock, and not to lift the end too high as you write – this will stop any scratchy noises. All the letters are a combination of light, thin upwards and sideways strokes and lovely thick nib-bending downwards strokes. I’ll write some examples for you to practice. Watch me first, then try yourself, watch again and keep replaying any letters you struggle with.
Mastering the alphabet does take a lot of practice. Don’t rush – write one row of each letter at a time, so a row of bs, a row of fs – whichever letters you want to play with first. Remember practice should be fun!
To get to grips with a particular letter it can be really useful to write it really big at first – this will give you more time to see where to apply pressure, and how the letters are formed.
There are a few key letters a lot of beginners struggle with – and it’s easy to get fixated on a letter which you just can’t seem to get right, so I’d like to talk you through some of the worst for this and show you how to approach them.
The letter a begins at the top, curves downwards and around, and then the stroke downwards flicks up at the end. Try to keep the shape narrow – more like an egg than a football.
S and R are very similar – the difference is that R turns a corner at the top right, while S curls around. Practice them together to learn the difference
F is wonderfully curly – take it in stages and remember both loops are at the front of the letter. (It’s tempting to nip around to the back of an f at the bottom – but don’t)
T is simple – but remember not to loop it, and go slow with a really, really light crossing stroke.
X is strange – but I like to add a little curve to add shape. It’s fine to lift your pen!
Z is another odd letter – stop and think before you dive into it, and add a little loop at the top left if joining feels tricky
With each new letter you learn, you can begin to practice short words – and this is really important as it will help your calligraphy to flow. The joining strokes between the letters are equally as important as the letters themselves. A lovely student once described them as washing lines to hang your letters on, and I love this description so much!
So practice writing little words and stringing them together with different lengths of joining strokes (aka your washing line) as you go!
Join me on Instagram or Facebook for new calligraphy inspiration and ideas, special offers and calligraphy tips! I’m @bymoonandtide on Instagram and Facebook.com/byMoonAndTide
Claire xx
CREDITS
Claire Gould, by Moon & Tide Calligraphy
byMoonandTide.com
Instagram: @bymoonandtide
Facebook: Facebook.com/bymoonandtide
With huge thanks: these video tutorials were made by Paul Kyte Wedding Photography and wedding photo-films www.paulkytephotography.com
At a glance: skip to another modern calligraphy tutorial in the series:
Tutorial 1 – lines & loops
Tutorial 2 – first letters
Tutorial 3 – lower case alphabets & first words
Tutorial 4 – the beautiful side of capital letters!
Tutorial 5 – curls, curves and common mistakes + the gallery
Tutorial 6 – brush lettering, working in colour + suppliers