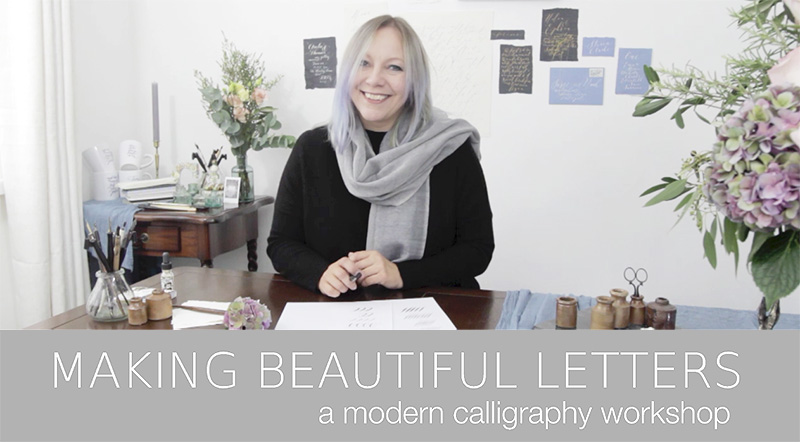
Are you ready to start Making Beautiful Letters?
Today we’ll learn how to prepare your calligraphy pen, load it with ink, and control the flow of ink to create delicate and dramatic lines. I hope you enjoy this first tutorial!
There are two worksheets to go with the video, which you can download here. Print these before you start (a couple of copies of each won’t hurt!)
1. Line practice
2. Loops
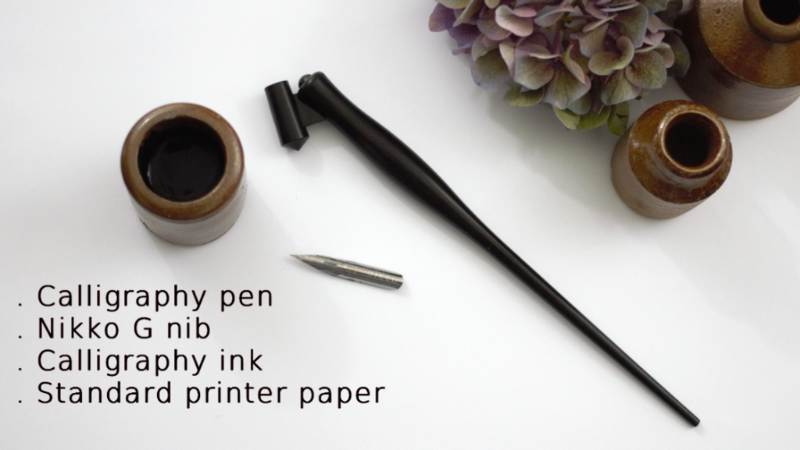
To complete this first workshop you’ll need:
1) calligraphy pen
2) any pointed calligraphy nib (not chisel tip; not a fountain pen) – I use a Nikko G nib
3) calligraphy ink (‘Calli’ inks are lovely – or mix gouache paint and water)
4) good quality printer paper
5) printed copies of the worksheets above: line practice and loops
A pen, nib and quality ink are included in my calligraphy starter kit, which you’ll find at www.ByMoonAndTide.com. Alternatively you can find the right pens, nibs and inks at most calligraphy equipment stores online.
~ WATCH THE VIDEO TUTORIAL HERE ~
Making Beautiful Letters – a modern calligraphy workshop. Tutorial 1 from Claire Gould on Vimeo.
Today you will need the following:
If you don’t have a Nikko G nib, don’t worry. Most pointed nibs will be fine – the Nikko G is just a fantastic beginner’s nib as it’s durable, not too sharp (so it won’t catch in the paper) and has a lovely flexibility.
If you have a Zebra or Tachikawa G nib, these will be fine. Leonardt Principal nibs and Brause rose nibs are good examples too. If you have a nib and you’re unsure if it’s the best thing to use for these tutorials, email me and ask! I’ll be happy to help. (hello@calligraphy-for-weddings.com)
Claire x
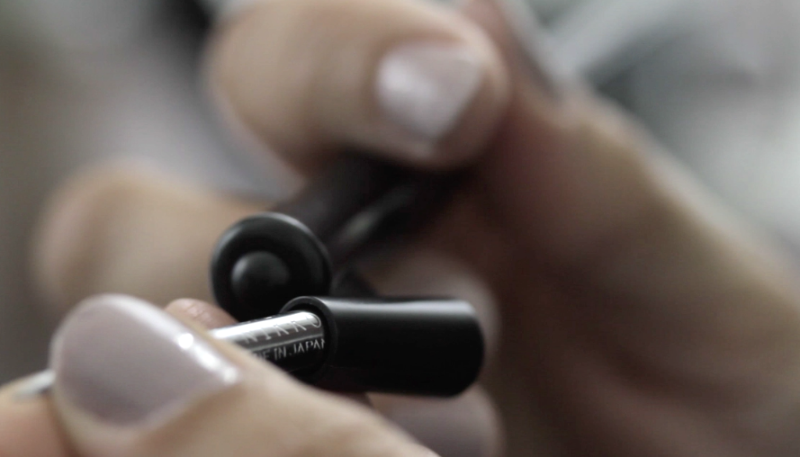
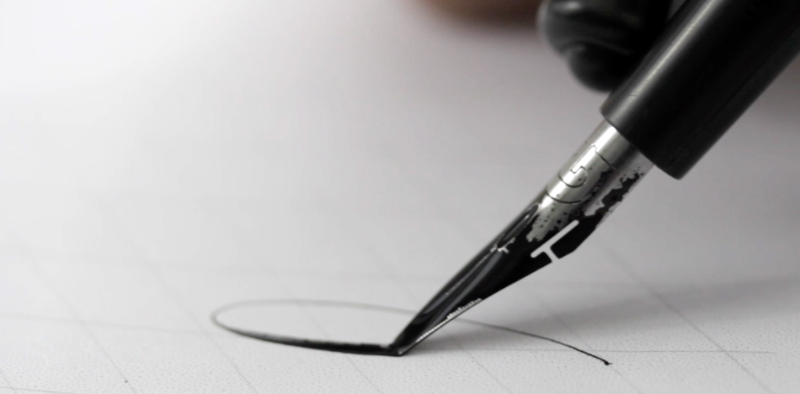
This is how to insert the nib. Note the flange (sticky out bit of black plastic) is on the left of the penholder. The nib slides into the circular slot at the top, roughly as far as the I in Nikko. When you place the penholder on your table, the nib should be right in the middle with the tiny hole and ‘G’ on top.
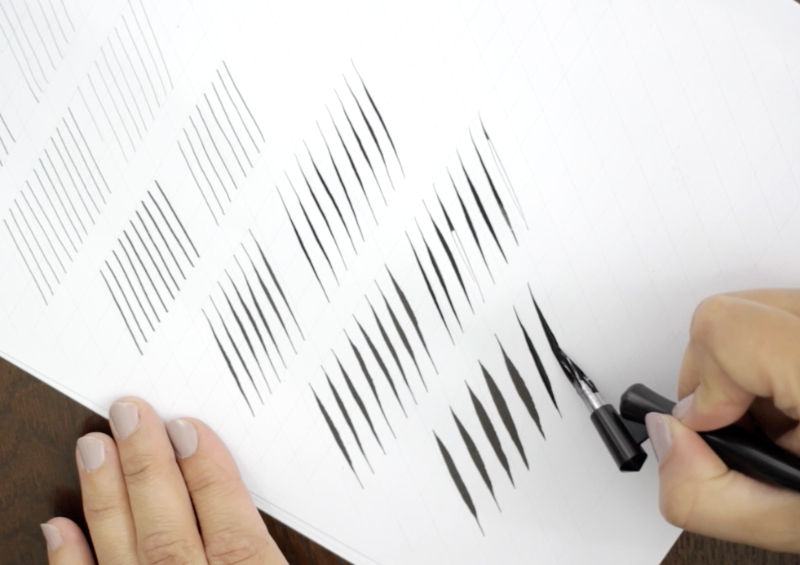
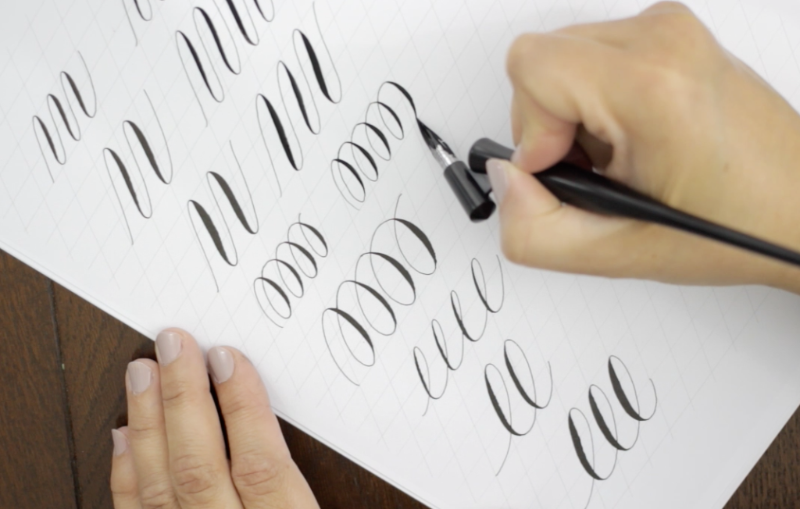
Some stills from the first worksheets to remind you:
Frequently Asked Questions
1. I keep running out of ink – help!
When you dip your nib into the ink, make sure it goes in far enough to cover the tiny hole halfway up the nib. At first, you can’t really overload your nib so use it as a spoon and scoop up plenty of ink, right from the bottom corner of your ink bottle. The curve of the nib holds the ink in place so it’s unlikely to drip (gravity – isn’t it magic?)
You’ll need loads of ink for the very thick lines on the first worksheet. Running out of ink is to be expected – and it will actually help you see how the ‘tines’ of the nib are parting to make those thick strokes. Don’t worry – you won’t often be writing such large strokes – this is just a practice exercise
2. My lines are very wobbly. Am I doing something wrong?
Not at all! This is natural for beginners, and even I have days where my first strokes of the pen have a bit of a wobble. Your lines will smooth out in time. To help, you can place a sheet of card or a couple of pieces of paper under the one you’re writing on (because sometimes a bumpy table can be the cause). Watch how I write those first lines and try to write at the same speed – going too slowly can exaggerate any wobbles; going too fast makes it harder to control your pen
3. I am still running out of ink, I can’t even do a full stroke!
Most often, this is because you’re holding your pen at an almost vertical angle. The ‘other’ end of your calligraphy pen shouldn’t come up too high. It’s like a teapot: if you tip it all the way up, the ink will come pouring out too fast. Hold it a little more level, and the ink will flow more slowly.
Next time…
We’ll be writing our first letters, incorporating the thick and thin strokes, and smooth curves into the letter shapes. If you feel you need to, have a couple of practice sessions with your lines and loops until you’re happy you can smoothly go from a thin stroke to a thick one and back again.
Video transcript
Hi! I’m Claire, and I’m a calligrapher. I’m self-taught and I’ve had my own calligraphy business for over 10 years, writing mainly for weddings and selling little gifts and goodies. I’ve been teaching modern calligraphy since 2013.
I love watching people write. There’s something especially magical about watching a calligraphy pen flex and slide along the paper, leaving an inky trail in its wake. Teaching workshops is amazing – anyone can learn modern calligraphy. It takes a little time, regular practice and the right tools – so let’s get started!
My modern calligraphy starter kit has everything you need to get started: an oblique pen and nib, guidelines, paper and a little pot of silky smooth black ink. There’s also a copy of my book in there, which is full of beautiful examples, simple exercises and tips and tricks to help you write gorgeous letters! If you don’t already have your kit, you can order online now at www.ByMoonAndTide.com and quote the code BEAUTIFUL for a 10% discount. To do this tutorial all you need is your pen & (ideally Nikko G) nib, ink and paper.
The most exciting bit is your new pen. Slide the nib into the penholder and you’re ready to write… almost! First you’ll need a potato. New nibs are coated with a fine oil by the manufacturers, so they don’t go rusty. To remove the oil, poke your nib into a potato and the starch will remove the oil for you!
Dip your nib into the ink, up to the top of the little hole halfway up the nib. Then you’re ready to write – but for now all I want you to do is make some marks on the paper. Little, light-as-a-feather strokes, moving up and sideways on the paper. Then thinner, lighter… and even lighter! It takes practice, but these super light strokes are what will make your calligraphy really beautiful.
But right now, we want to dive right in – so no more delicate strokes: I want you to really bend that nib. Today I just want you to flex the nib so the ends part to about 2mm. Don’t be shy, and don’t be too gentle! As you move downwards on the page, start with gentle pressure and gradually – still moving the pen – press harder. It might take a few tries, but you’ll start to see the tines of the nib part, and as they part the line you make on the worksheet will grow thicker.
Try a few times. See how thick you can make that line. Move on to the next worksheet when you’re ready, and practice moving from a light stroke to a heavy one and smoothly back into a light stroke. It’s really important here to remember you should only use pressure when your nib is moving downwards. So when you curve around a corner, or begin to move your pen upwards, you should aim for that light-as-a- feather stroke we were using earlier.
The exercises on the second worksheet will help you master the strokes – moving smoothly from a light stroke to a heavier one, and cornering with no pressure whatsoever, are what we’re aiming for.
Every couple of minutes, wipe your nib with a little kitchen paper to stop ink drying and clogging the tip. Work your way through the exercises on both worksheets a couple of times, practicing both the thin and thick strokes: you’ll need to move in and out of both as we progress to letters, alphabets and flowing letters.
Homework!
Practice both of the worksheets a couple of times – master these, and we’re ready to move on to something a little more adventurous in part 2!
Join me on Instagram or Facebook for new calligraphy inspiration and ideas, special offers and calligraphy tips! I’m @bymoonandtide on Instagram and Facebook.com/byMoonAndTide
Claire xx
CREDITS
Claire Gould, by Moon & Tide Calligraphy
byMoonandTide.com
Instagram: @bymoonandtide
Facebook: Facebook.com/bymoonandtide
With huge thanks: these video tutorials were made by Paul Kyte Wedding Photography and wedding photo-films www.paulkytephotography.com
At a glance: skip to another modern calligraphy tutorial in the series:
Tutorial 1 – lines & loops
Tutorial 2 – first letters
Tutorial 3 – lower case alphabets & first words
Tutorial 4 – the beautiful side of capital letters!
Tutorial 5 – curls, curves and common mistakes + the gallery
Tutorial 6 – brush lettering, working in colour + suppliers