Almost a year ago I had an email from another calligrapher who’d seen my gold leaf name on Etsy. She asked how it was done – it’s tricky to add gilding to anything so fine.
I’ll be teaching a calligraphy workshop in Coniston (in the Lake District) on the 21st of March and I decided this would be a lovely project to share with people. It’s deceptively easy with the right tools, and only takes a little patience to master!
If you follow me on Instagram you’ll have seen this in my Stories – applying gold leaf is really satisfying to do – and to watch! I wanted to share a more detailed tutorial for you to follow if you’d like to try this at home.
You will need:
- Calligraphy pen + nib
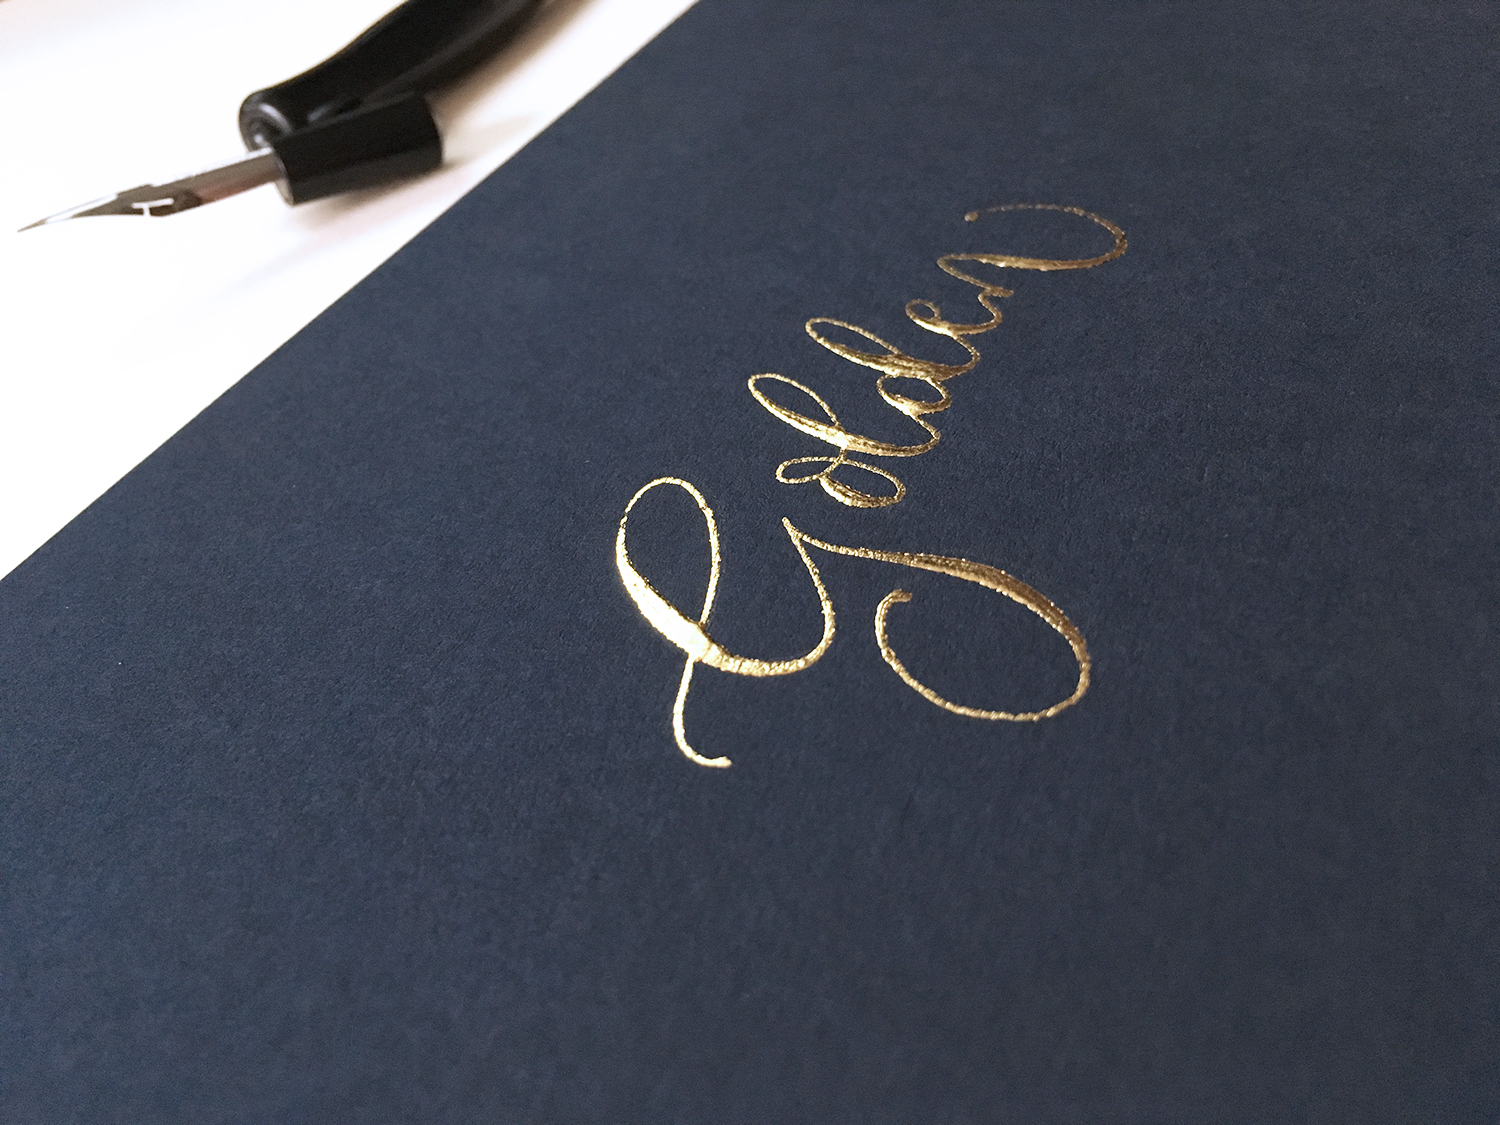
(I use a speedball oblique penholder and a Nikko G nib, both available from Blots Pens, Scribblers or Penman Direct) - Kölner Miniatum Ink
- Transfer gold leaf
- Dark coloured card (navy blue gives a stunning result)
- A clean, dry, soft paintbrush
Kölner Miniatum Ink is basically a glue with an inky consistency so it flows relatively easily through a calligraphy nib. It doesn’t sink into paper so it gives a raised effect to your finished gilded letters.
Practice a couple of times with the ink on ordinary paper to get a feel for its consistency, as it is thicker than normal ink. You’ll need good light to see it on dark card, so sit near a window or have a table lamp to the side of you.
Write your name on the card and then quickly clean any glue / ink residue from your nib. Too slow and your nib will get all stuck together!
TIP: Clean your nib very, very regularly when writing with Kölner Miniatum Ink – at least every minute, but preferably every 30 seconds or so. It dries and sticks FAST!
Leave your calligraphy to dry for approximately 20 minutes, until all the pink bits have disappeared and the ‘ink’ is transparent. Don’t leave it too long though, as the ink should still be tacky for the gold leaf to adhere to it. As a general rule, apply the gold as soon as the ink is clear.
Take a piece of transfer gold leaf and place it onto the name you’ve written. Hold it still while you rub slowly, pressing with your finger around the edges of every letter and stroke so the gold covers even the thin hairlines of your calligraphy. You can do this twice to get a more thorough coverage of gold leaf.
Remove the transfer sheet and ‘tidy up’ all the loose bits of gold around the letters. Poke the edges and corners within each letter with the tip of your brush to remove the rough bits around the sides, and give your name a little polish with the brush so it shines!
There are still a handful of places left for the modern calligraphy workshop on the 21st of March. Click here for information and to book your (full day) ticket.
For morning (beginners) or afternoon session tickets visit www.eventbrite.co.uk/o/swallows-amp-artisans-16890265992