It’s a scarily big step to go from practising calligraphy at home to showing to people – and getting your first ‘wow’ from a friend or a client.
One of my lovely calligraphy students just told me she has a 90 day goal of getting a first calligraphy client – which makes me so proud! She inspired me to come up with some baby steps – ideas to slowly filter your calligraphy practice out into the big wide world, so it becomes that much easier to share it with people – and eventually, to sell your craft!
Here’s a little list of ideas to help you share and publicise your calligraphy. I’ve written it as a weekly challenge, which I think will be a lovely way to start.
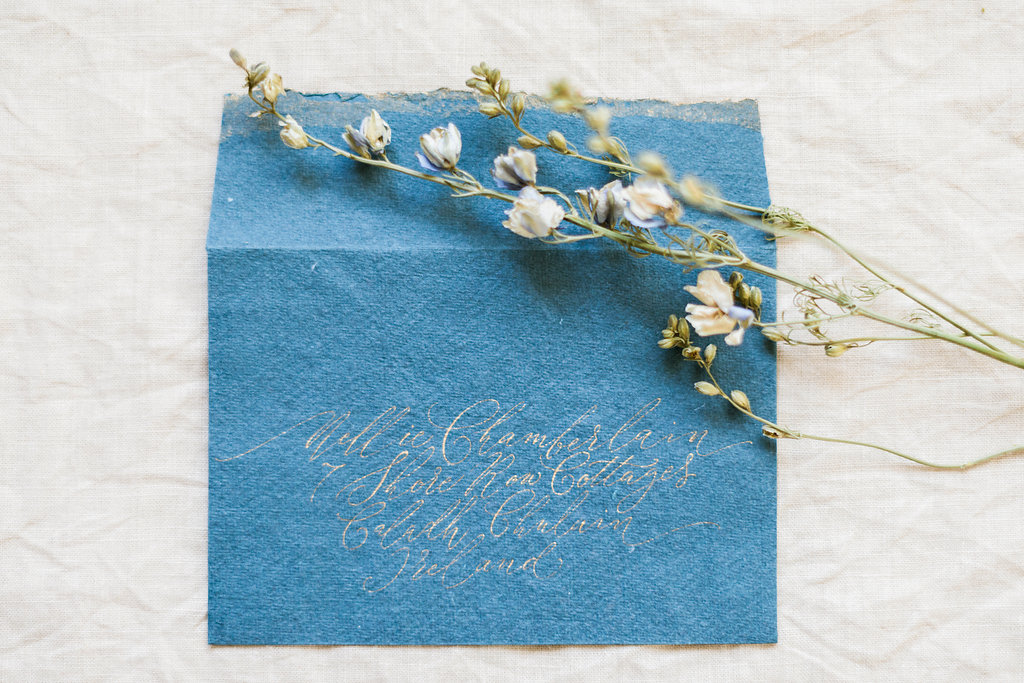
- Week 1 – write a beautiful envelope and send it to a friend (maybe put a photo inside?) the key is to make it the best envelope that’s ever landed on their doorstep!
- Week 2 – write yourself a little motivational postcard and pin it on your wall where you’ll see it every day. Write another and send it to a friend who needs a boost! Extra points if they share it on insta 🙂
- Week 3 – write someone’s birthday card and envelope in calligraphy.
- Week 4 – write a beautiful envelope and send it to a friend at their work. This way, colleagues will see it, the post people in their office will see it, and they’ll say “oh, my friend Caroline is a calligrapher”
- Week 5 – write a beautiful name in calligraphy for a child you know. This could be your son or daughter, your cousin, sister, nephew or niece or a friend’s child. The rule: they have to be 12 or under.
- Week 6 – gift someone something. Buy a cheap frame in a shop (for under £5), write a calligraphy quote and decorate it with a few flowers, then gift wrap it and give it to someone.
- Week 7 – Create something especially for instagram. Make it impactful and take a great photo (throw some flowers or leaves on it!) – then share it on your insta with some hashtags: #learningcalligraphy #calligraphypractice etc – use at least 10 hashtags so other people learning calligraphy will see it too!
- Week 8 – Invent an imaginary client. Perhaps it’s your dream customer – a bride-to-be or parents decorating a nursery for their little one. Pretend they ordered something, and make it for them. Pop it on instagram and say something like “a cute little invite designed for a summer wedding” – and remember those hashtags!
- Week 9 – perfect your photography skills. Beautiful images of your work make ALL the difference. Gather together some little props (silk ribbon, flowers, pens, stamps, cute little stationery bits) and teach yourself how to do flatlays. (Insta is your friend if you need to research this!)
- Week 10 – Create your brand name. Whether it’s your own name or a name for your business, having this in mind and writing it beautifully makes this little calligraphy project into something serious and exciting! It doesn’t have to be perfect, and it doesn’t have to be your logo forever… but just writing ‘Honey & Bee Calligraphy Company’ for real will be kind of a big deal!

I’ll be running an intermediate modern calligraphy workshop on the 17th of August in Manchester. If you’ve done a little calligraphy and would like to try some fun projects, and chat with me about turning your calligraphy into a business, I’d LOVE to see you there!
It will be a friendly, chatty, small class with tons of advice and personal attention for everyone so we can take your calligraphy to the next level!
Tickets here – www.bymoonandtide.com/listing/631828056
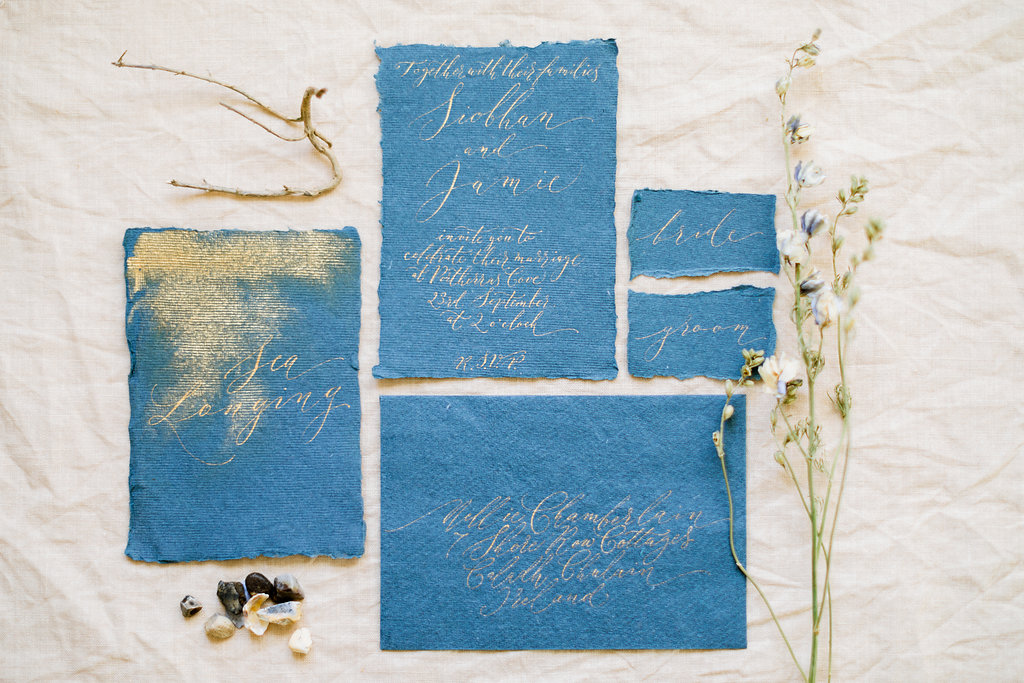
These beautiful photos are by Kathryn Hopkins
Fantastic post, all really ideas to get started! Can’t wait to get going